Taylor cone
Taylor Cone Formation
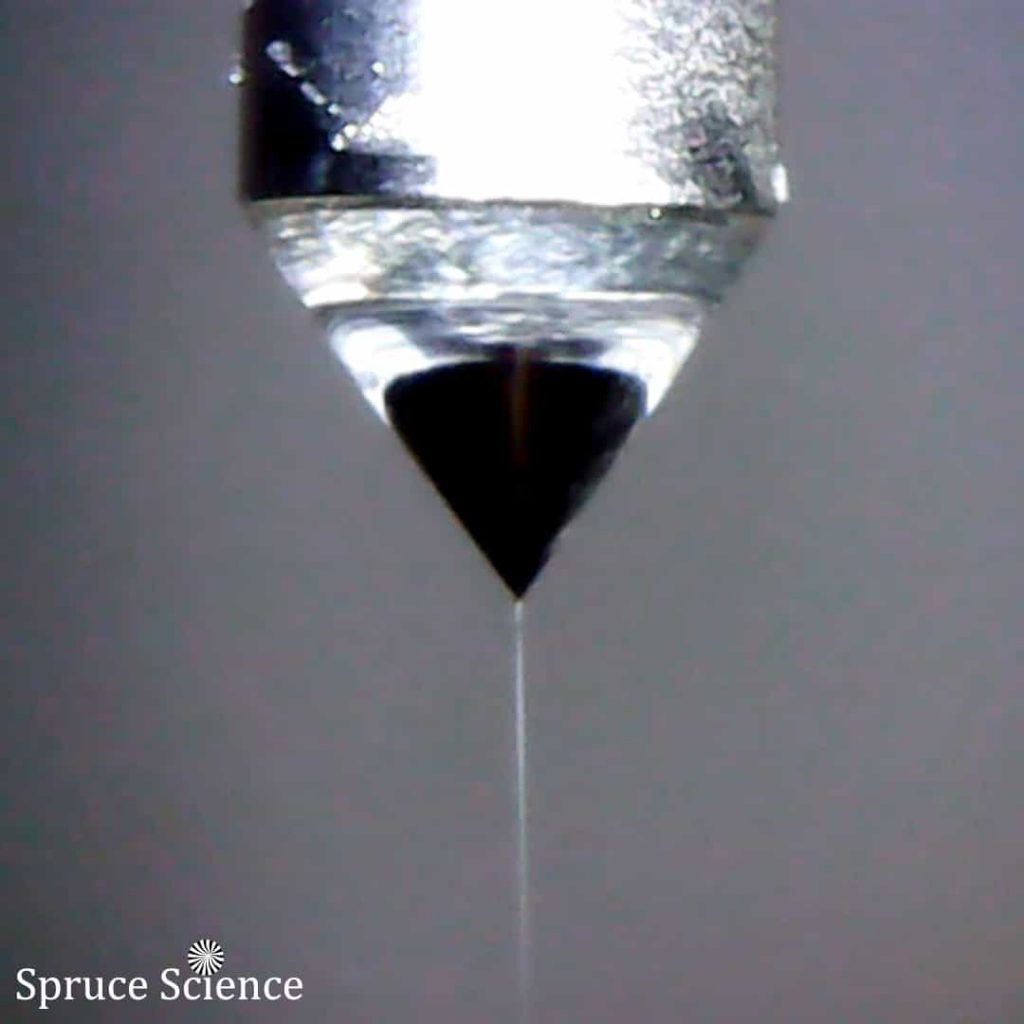
Characteristic Taylor Cone Formation
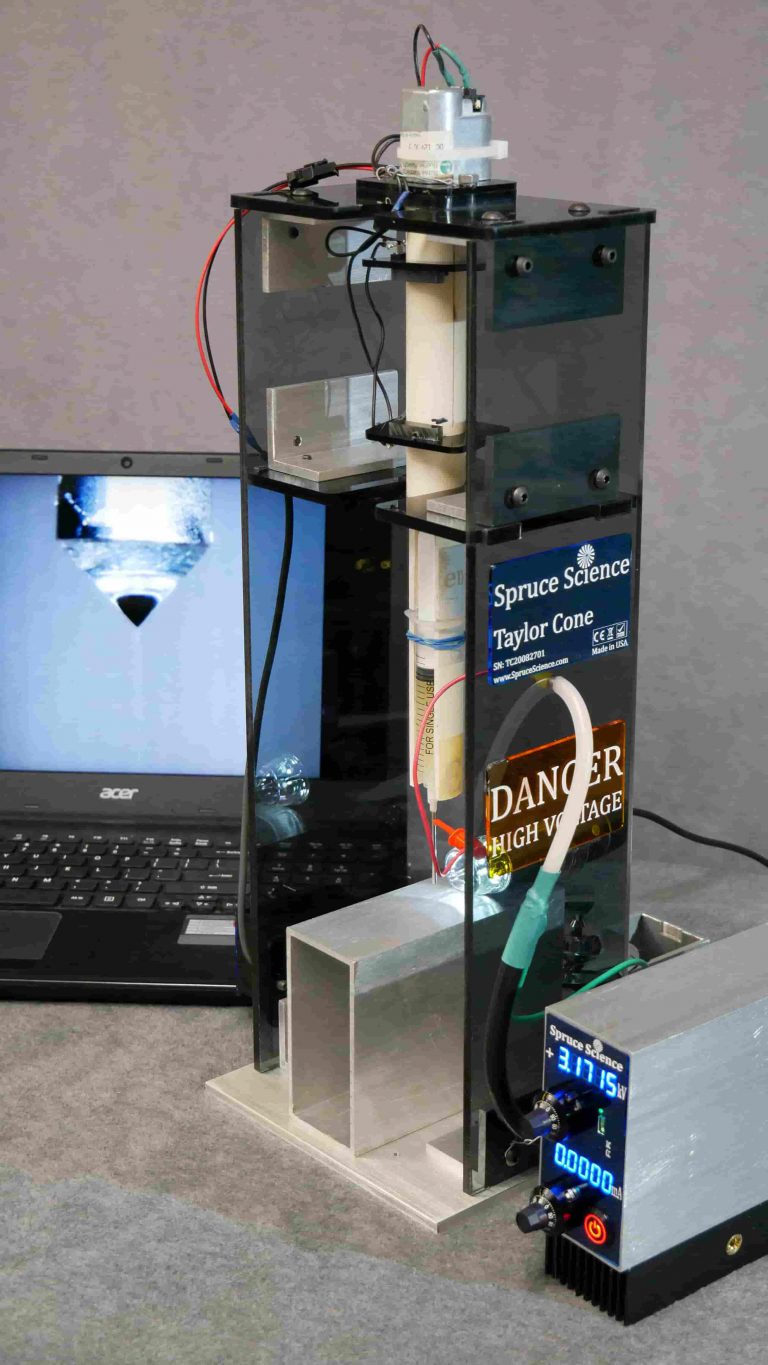
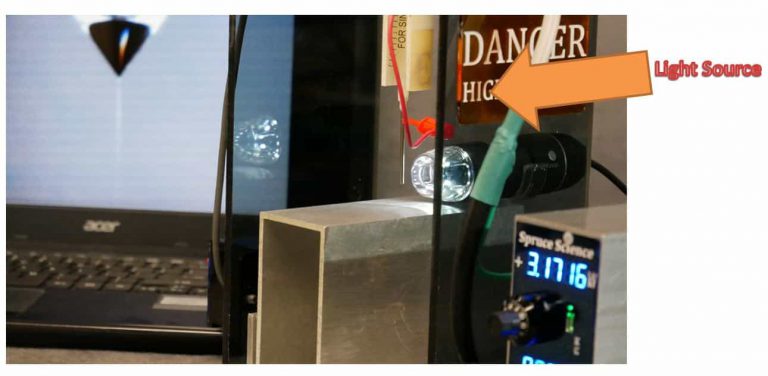
A lot of fascinating science can be observed during electrospray ionization if the tip of the needle is inspected under high magnification. When high voltage is applied from the needle, which is carrying a liquid flow, to the ground plate, there is this characteristic formation known as a Taylor cone. That Taylor cone is then pulled into a jet. From there, the jet is further disrupted into a series of tiny droplets. This characteristic formation is established when high voltage is balanced with pumping rate.
The general observation for the electrospray ionization process is if the applied voltage is too high and field extraction exceeds pumping rate, spraying jet tends to be off axis or causes arcing. However, if the applied electric field is too low, it leads to instability. For performance tuning, having an adjustable precision high voltage power supply is essential. The sign of the voltage drop across the liquid sample to the ground plate will determine which ion types we are looking at. In this demonstration, positive high voltage output is connected to the needle and the ground plate is negatively charged, meaning that positively charged ions are selected in the electrospray ionization process.

High Voltage Connections
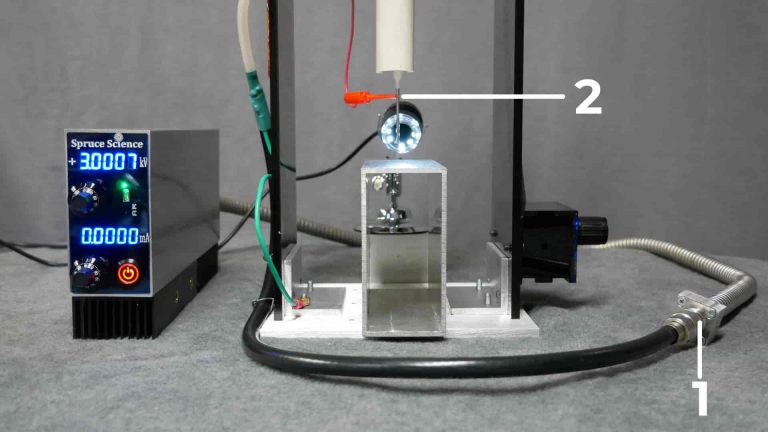
There are two high voltage connections:
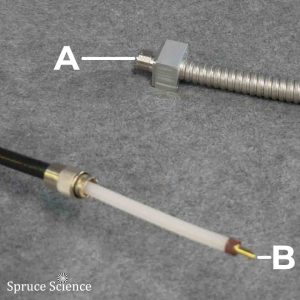
- Connection between Lab Mate high voltage power supply and Taylor Cone tower.
- High voltage connection to liquid sample
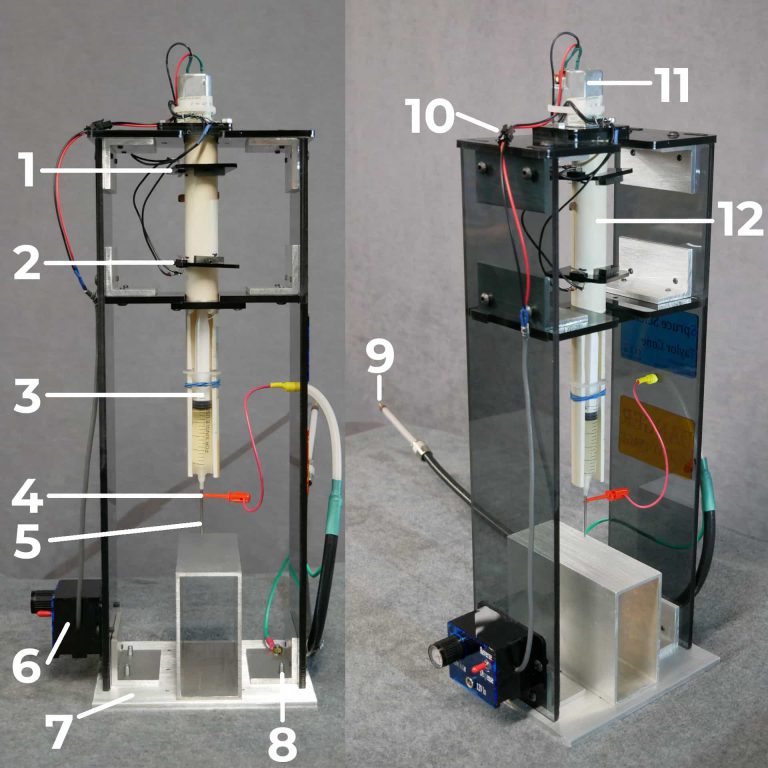
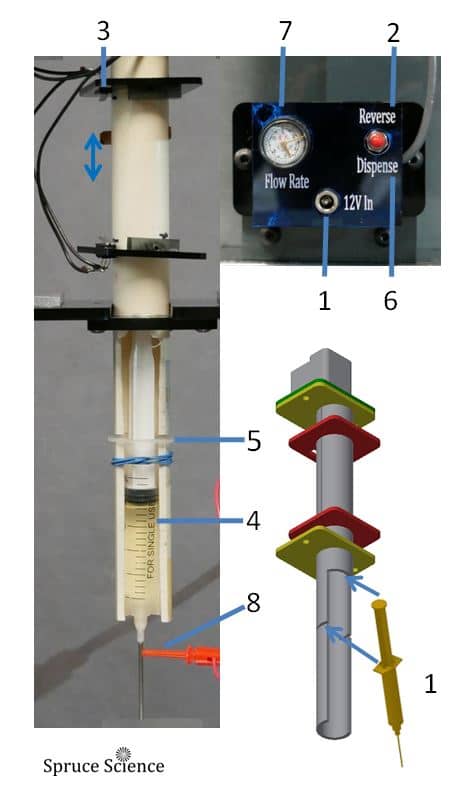
Syringe Pump Usage Illustration
WARNING!
Turn OFF the high voltage power supply and do not touch anything that has been connected to the output of the power supply. Wait five minutes for the high voltage power supply internal capacitors to discharge and also make sure the load capacitance is discharged. And, then discharge any remaining stored energy by connecting the high voltage output to ground. Failure to follow these safety warnings can result in injury or death.
- Plugin 12V DC to power the Taylor Cone hardware.
- On the Control panel, push the switch upward to “Reverse” and hold it until the upper limit switch is triggered. The motor will rotate at maximum speed when traveling in the up direction.
- After the highest position is reached, carefully remove the syringe from the white tube housing.
- Fill the syringe with liquid. Note that liquid type makes a big difference in Taylor Cone formation. For instance, using the alcohol solution gives a much better result when compared to water.
- Insert the plunger end of the syringe into the white tube housing. Then lock the syringe in the housing by placing the hand tab of the syringe on the slot of white tube housing.
- Push and hold the switch downward to “Dispense” until the pusher inside the white tube is engaged with the syringe plunger. When engaged, liquid droplets will form at the tip of the needle.
- Dispense speed can be adjusted using the potentiometer located on the Control panel. The dial position between 6 o’clock to 9 o’clock is normally the usable range.
- Connect the HV clip to needle. WARNING! Make sure the high voltage power supply is OFF before touching the clip.
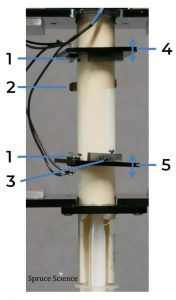
Limit Switch Position Adjustment
The syringe pump housing can accommodate different syringe sizes. The limit switch position can be adjusted to compensate for varying requirements.
- The lowest and highest position of the syringe pump stroke can be adjusted by moving the switch assembly position.
- Both the upper and lower limit switch position can be adjusted by loosening M3 setscrews.
- Position the microswitch sensing arm so that it engages with the actuator.
Safety
Your safety is paramount and rigorous safety practices must be enforced to ensure your safety when working with high voltage.
This power supply produces high voltages and stores energy that is hazardous. Physical contact with the high voltage output may result in life-threatening or fatal injury.
Before you turn on the high voltage power supply, always confirm first that the dial indicators are turned fully in the counter-clockwise direction and confirm the turn counting indicator reads 0.
Visually inspect the high voltage output connector and any high voltage connections for unintended touching or electrical shorts.
Always keep a safe distance from the test equipment and apparatus or system under test.
Do not touch connections unless the high voltage power supply is off and capacitors are completely discharged. Allow five minutes for the high voltage power supply internal capacitors to discharge. Also, make sure the load capacitance is discharged.
Be extra cautious of any high voltage connections that are exposed. Such live terminals should be shielded and barriers must be provided to prevent accidental contact.
Proper grounding is very important. High voltage power supplies must always be grounded. Ensure that a secure ground connection is made between the high voltage power supply and earth ground.
All ungrounded terminals of the test equipment or apparatus under test should be considered as energized.
The work area for the HV power supply should be kept clean. It is important to put away unnecessary parts and components and to keep them far away from the test area.
The general work area around the HV power supply and high voltage connections must be kept dry.
Do not ground yourself or work under wet or damp conditions.
Always consult with your organization’s health and safety expert.