Planetary Motion Vacuum Mixer for Preparing Silicone
Demonstration Notes
Introduction
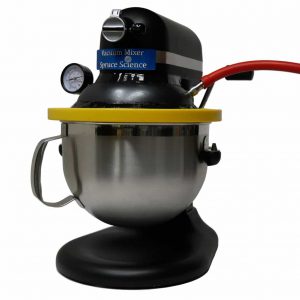
The Vacuum Mixer from Spruce Science is a valuable tool for mixing a wide range of materials under reduced atmospheric pressure. One of the main benefits of using a vacuum mixer is the ability to eliminate the incorporation of air bubbles and prevent unwanted secondary reactions with atmospheric gases. In this paper, we will discuss the features and applications of the vacuum mixer and demonstrate its effectiveness in various mixing scenarios.
Problem Statement
Mixing two-component systems such as silicone and epoxy in open air can result in the formation of air bubbles that can be difficult to remove. This is problematic because thorough mixing of the base and curing agent is necessary for proper curing and cross-linking of the polymers. While a degassing vacuum chamber can effectively remove bubbles from silicone polymer, this two-step process of mixing and then removing air bubbles is operationally intensive and time-consuming, requiring the handling of multiple pieces of equipment and additional cleaning steps.
Solution
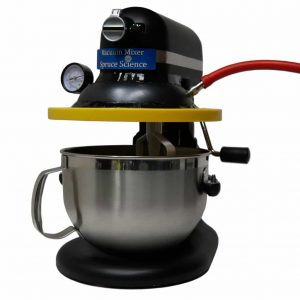
To address the issues associated with mixing two-component systems in open air, the solution is to combine the mixing and degassing operations into a single step using a vacuum mixer. The Vacuum Mixer from Spruce Science allows you to mix a wide range of materials under reduced atmospheric pressure, eliminating the incorporation of air bubbles and preventing unwanted secondary reactions with atmospheric gases. The mixing bowl is pumped free of air and the mixing is carried out under low pressure in planetary motion to ensure thorough mixing. By using a vacuum mixer, manufacturers can achieve shorter processing times and increased productivity, as well as more consistent results and improved product quality.
Benefits
The vacuum mixer from Spruce Science offers a range of benefits for manufacturers. Its equipment usage is flexible and it can mix polymers, liquids, ingredients, or dough, making it suitable for a wide range of applications.
Using the vacuum mixer can result in more consistent results, as unwanted secondary reactions with atmospheric gases such as oxygen and nitrogen are avoided. By mixing in an environment where air is removed, bubble formation is prevented and the underlying problem of air bubbles is eliminated. This can lead to improved product quality and performance.
In addition, the vacuum mixer simplifies the mixing process by reducing the number of steps required. This can lead to shorter operation times and increased productivity, making it a valuable tool for manufacturers looking to streamline their operations.
Step-by-step Guide for Vacuum Mixing
The vacuum mixer from Spruce Science is an effective tool for mixing two-part silicone. To see how to use the vacuum mixer for this purpose, check out the video demonstration on our Spruce Science YouTube channel.
The following is a step-by-step guide to using the vacuum mixer to prepare silicone for use:
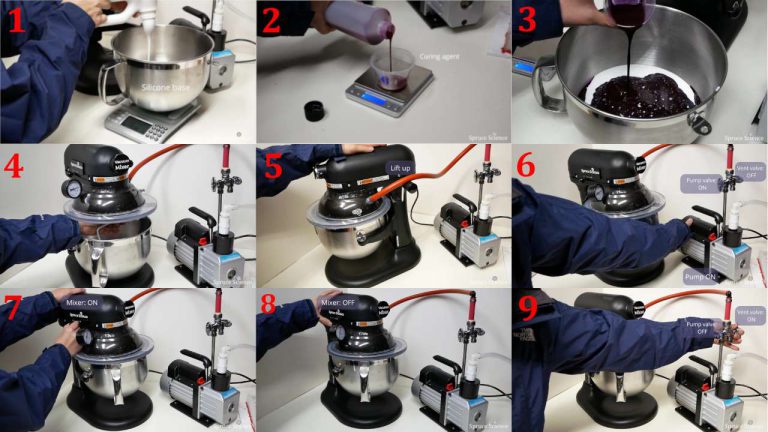
- Begin by weighing out the desired amount of silicone base and pouring it into the mixing bowl. Remove the mixing bowl from the stand of the vacuum mixer and place it on a scale to accurately measure the weight of the silicone base.
- Next, pour the silicone curing agent into a separate container to ensure that the proper curing ratio is achieved. It is important to use a separate container to avoid accidentally pouring more curing agent than needed.
- Once the desired amount of curing agent has been measured out, pour it on top of the silicone base in the mixing bowl.
- To begin the mixing process, secure the mixing bowl onto the lift stand of the vacuum mixer and lock it in place. Then, carefully install the mixer attachment, making sure it is properly aligned and secured.
- To seal the mixing bowl and initiate the vacuum process, lift the bowl up by turning the handle counterclockwise and seal it against the lid of the vacuum mixer.
- Once the mixing bowl is sealed, turn on the vacuum pump to begin pumping down the vacuum chamber. Monitor the pressure using the gauge to achieve the desired vacuum environment. This may involve adjusting the settings on the pump or using a valve to release excess pressure.
- Once the vacuum chamber has reached the desired pressure, turn on the mixer to begin the vacuum mixing process. The mixing is carried out under low pressure in planetary motion to ensure thorough mixing. In this demonstration, vacuum mixing was carried out for 5 minutes, but you may want to experiment with different mixing times to find the optimal duration for your specific application.
You can see the mixing action under vacuum with the silicone sample in the video on our YouTube channel. - Once the mixing is complete and you are satisfied with the results, turn off the mixer by setting the control knob to 0. This will stop the vacuum mixing process.
- After the mixing process is complete, the mixing bowl will still be under vacuum. To safely remove the mixing bowl and mixer attachments, you will need to vent the chamber to atmospheric pressure. To do this, turn off the valve to the pump and then turn on the vent valve to release the vacuum. Once the inside pressure is equalized to the outside pressure, you can safely remove the mixing bowl from the lift stand and remove the mixer attachments.
- If you are satisfied with the results of the vacuum mixing process, the silicone or epoxy is now ready for further use. If you are not satisfied with the sample, you can use the vacuum mixer again to continue mixing under vacuum. Keep in mind that most two-part silicone or epoxy has a limited working time, so you will need to work efficiently to ensure that the material is used before it cures. Once you have achieved the desired consistency and performance of the material, it is ready for further use.
Video Demonstration